The Case for a Cable Management System That Actually Works in Your Home Office

Amara Osei
March 15, 2026

Your desk has a monitor, a laptop, a lamp, a charger, maybe a webcam or a DAC. Each of them has at least one cable. Multiply that by a power strip, a router, and the occasional USB hub, and you’re not just working at a desk—you’re presiding over a nest. It’s easy to ignore until you need to plug in one more thing, or until a cable slips behind the desk and you spend ten minutes fishing it out. A cable management system that actually works isn’t about aesthetics for the sake of Instagram. It’s about reducing friction, making changes easier, and keeping your workspace from fighting you every day.
Most “cable management” advice is either too minimal (get a few clips and hope for the best) or so elaborate it becomes a project in itself. The sweet spot is a repeatable system: consistent choices that keep cables grouped, labeled, and accessible without turning your desk into a museum piece. Here’s how to get there.
Why “Just Tidy the Wires” Isn’t Enough
Ad-hoc fixes—twist ties, random clips, stuffing everything behind the monitor—tend to create new problems. Cables get tangled when you add or remove a device. You can’t tell which cord goes where without tracing it. The power strip becomes a single point of failure buried in a heap of cables, and when something trips or you need to unplug one thing, you’re dismantling the whole mess.
A system that works has a few properties: it’s easy to add or remove a cable without redoing everything, it keeps power and data runs somewhat separate so you’re not wrestling a knot of both, and it doesn’t rely on you remembering how you did it last time. That usually means a small set of tools and a simple rule set, not a one-time “cable day” that collapses as soon as your setup changes.
Start With the Power Strip
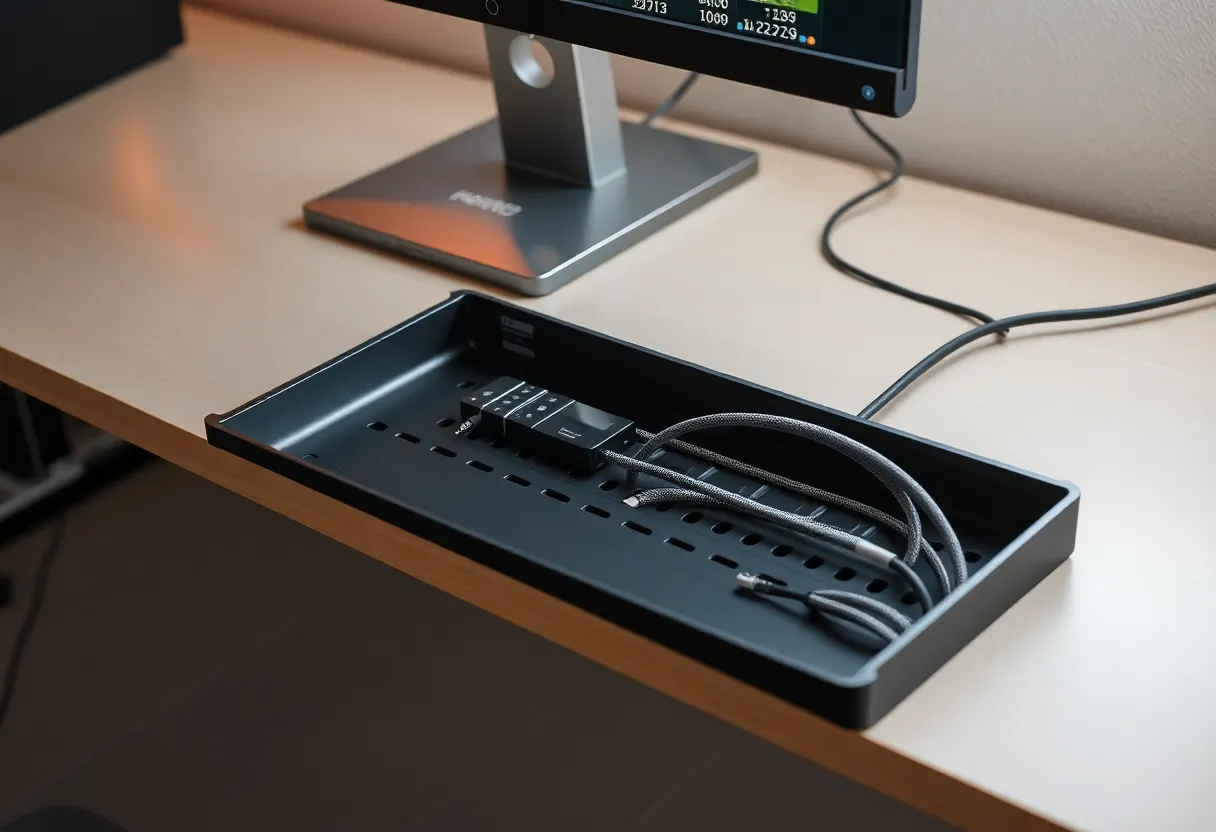
The power strip is the spine of your desk. If it’s sitting on the floor or wedged behind the desk with no plan, every other cable decision gets harder. Mount it. Use adhesive strips, a tray, or a bracket under the desk so it’s fixed in one place. That gives you a known anchor: power cables run from devices to the strip in predictable paths instead of draping randomly.
Choose a strip with enough outlets and, if you care about surge protection or filtering, one that matches your needs. Avoid the temptation to daisy-chain multiple strips under the desk; one good strip, mounted, is easier to manage and safer than a chain of cheap ones. If you need more outlets, consider a second strip in a second location (e.g. one under the desk for the computer and peripherals, one on the desk for phone and small devices) rather than stacking everything on a single run.
Group and Route by Purpose
Not all cables are equal. Power cables are thick and often stay put. USB and display cables are thinner and get swapped more often. Keeping power runs separate from data runs reduces tangling and makes it obvious which cable does what. Use a cable sleeve or a channel to bundle cables that run the same path—for example, from the back of the monitor down to the strip. One sleeve per “run” (e.g. “monitor + its power”) keeps things readable.
Leave a bit of slack at both ends. Cables that are pulled taut are harder to disconnect and more likely to strain the connector. A gentle loop or extra length at the desk edge or at the strip makes it easy to unplug or reposition something without redoing the whole run.
Labels and Consistency
Labels pay off when you’re troubleshooting or adding a device. A simple label on the cable or at the plug—”monitor,” “laptop power,” “USB hub”—saves time when you’re under the desk or when someone else needs to unplug “the router.” You don’t need a labeler; tape and a pen work. The goal is to know what you’re unplugging without tracing.
Consistency means doing the same kind of thing everywhere. If you use adhesive clips to hold cables to the desk edge, use them in the same way for each run. If you use a tray under the desk, run all cables into the tray instead of mixing tray and loose cables. The system doesn’t have to be fancy; it has to be repeatable.
When to Upgrade
Some upgrades are worth it. A monitor arm or a desk with a built-in cable pass-through reduces the distance cables have to travel and keeps them off the desktop. A USB-C or Thunderbolt dock can replace several cables with one (plus power), so you have fewer runs to manage. If you’re constantly plugging and unplugging one device—e.g. a work laptop vs. a personal one—a small USB or display switch can avoid cable swapping altogether.
Don’t over-invest before the basics are in place. A $200 cable management tray doesn’t help if the power strip is still on the floor and cables are ungrouped. Get the strip mounted, group the runs, add labels, and then see what’s still annoying. Often the next step is a single hardware change (dock, arm, or switch) rather than more cable gear.
The Payoff
A cable management system that actually works doesn’t demand constant attention. You set it up once with a clear logic, and then adding or removing a device is a small change, not a full rewire. You know where the power strip is, which cable is which, and where to run a new one. The desk stays usable as your setup evolves—new monitor, new laptop, new lamp—without collapsing back into a nest. That’s the case for doing it: not perfection, but a system that holds up under real use.